
Now Reading: HC-SR501 PIR Motion Sensor with ESP32 DOIT Kit v1
-
01
HC-SR501 PIR Motion Sensor with ESP32 DOIT Kit v1


Introduction
The HC-SR501 PIR (Passive Infrared) sensor is used to detect motion by sensing infrared radiation from objects, mainly humans and animals. It’s widely used in security systems, automatic lights, and smart IoT projects.
Key features:
- Detection range: 3–7 meters (adjustable).
- Output: HIGH (1) when motion is detected, LOW (0) when no motion.
- Adjustable sensitivity and delay time using onboard trimmers.
- Low power consumption, easy to interface with ESP32.
In this tutorial, we’ll connect the HC-SR501 PIR sensor to ESP32 (GPIO 18), read motion detection signals, and display results in the Serial Monitor.
Components Required
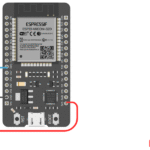
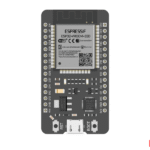
- ESP32 DOIT DevKit v1
- HC-SR501 PIR Motion Sensor
- Breadboard and jumper wires
- USB cable
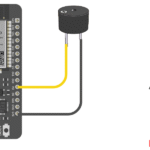
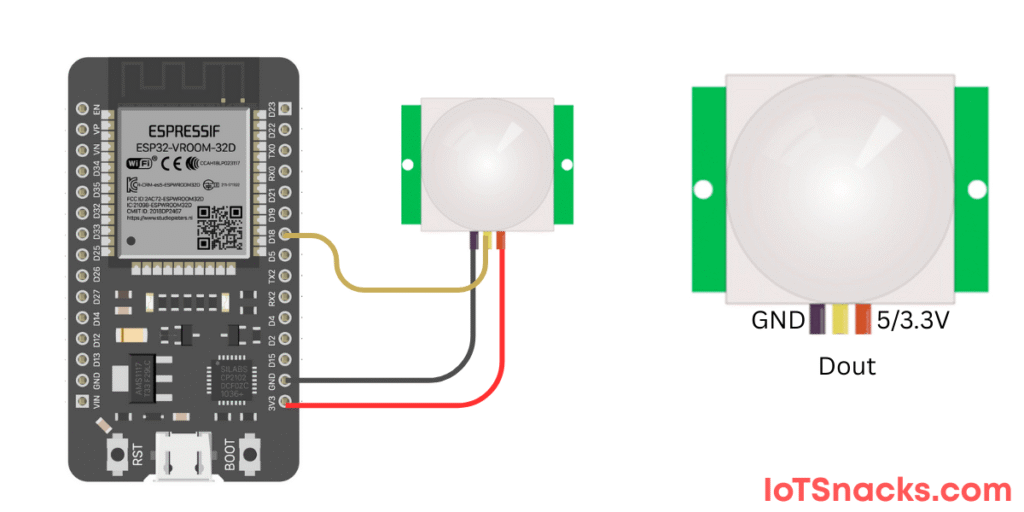
ESP32 & HC-SR501 Pin Connections
| HC-SR501 Pin | ESP32 DOIT Kit v1 Pin |
|---|---|
| VCC | 3.3V (or 5V, depending on module) |
| GND | GND |
| OUT | GPIO 18 |
Arduino Code
// HC-SR501 PIR Motion Sensor with ESP32
// OUT pin connected to GPIO 18

int pirPin = 18;   // PIR sensor OUT pin
int pirState = LOW; // Store PIR state

void setup() {
  Serial.begin(115200);
  pinMode(pirPin, INPUT); // Set PIR as input
}

void loop() {
  int sensorValue = digitalRead(pirPin);

  if (sensorValue == HIGH && pirState == LOW) {
    Serial.println("Motion Detected!");
    pirState = HIGH;
  }
  else if (sensorValue == LOW && pirState == HIGH) {
    Serial.println("No Motion");
    pirState = LOW;
  }

  delay(100); // Small delay for stability
}
Step-by-Step Code Explanation
Define PIR pin & state
int pirPin = 18;
int pirState = LOW;
PIR output pin connected to GPIO 18, initial state set to LOW.
Setup Function
pinMode(pirPin, INPUT);
Configures GPIO 18 as input.
Loop Function
int sensorValue = digitalRead(pirPin);
Reads PIR sensor output:
- HIGH → Motion detected
- LOW → No motion
State Change Detection
- Only prints message when sensor value changes.
- Avoids spamming Serial Monitor.
Real-Life Applications of PIR with ESP32
- 🏠 Home Security Systems → Detect intruders.
- 💡 Automatic Lighting → Turn on lights when someone enters a room.
- 🤖 Robotics → Detect human presence.
- 🏢 Energy Saving Systems → Switch off unused devices in offices.
- 🚪 Smart Doors → Open/close doors automatically.
Troubleshooting
| Problem | Cause | Solution |
|---|---|---|
| Always HIGH | Warm-up time | Wait 30–60 seconds after powering |
| No detection | Wrong wiring | Check OUT → GPIO 18, VCC, GND |
| Too sensitive | Sensitivity too high | Adjust potentiometer on sensor |
| Delay too long | Time delay set high | Adjust delay trimmer clockwise/counterclockwise |
Why does the PIR sensor always show HIGH?
The sensor needs 30–60 seconds warm-up time after power-up. After that, it will stabilize.
Can I power the PIR sensor from 3.3V pin of ESP32?
Yes ✅, but some modules work more reliably at 5V.
How do I reduce false triggers?
Keep the PIR sensor away from heat sources and direct sunlight, and adjust sensitivity trimmer.
What is the maximum detection distance of HC-SR501?
The detection range is up to 7 meters, adjustable via the onboard potentiometer.
Can I connect multiple PIR sensors to ESP32?
Yes ✅, you can connect multiple PIRs to different GPIO pins for wider area coverage.