
Now Reading: RGB LED with ESP32 DOIT DevKit v1 – Step-by-Step Tutorial
-
01
RGB LED with ESP32 DOIT DevKit v1 – Step-by-Step Tutorial


Introduction
An RGB LED is a special LED that can emit Red, Green, and Blue light. By combining these three colors in different intensities, we can create almost any color.
There are two types of RGB LEDs:
- Common Anode (CA) – all LED anodes are tied together and connected to +VCC. (we are using this type ✅)
- Common Cathode (CC) – all LED cathodes are tied together and connected to GND.
In this tutorial, we’ll control a Common Anode RGB LED using the ESP32 DOIT DevKit v1.
Components Required
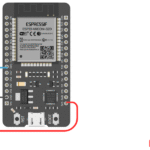
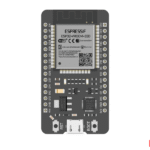
- ESP32 DOIT DevKit v1
- RGB LED (Common Anode)
- 3 × Resistors (220Ω – 330Ω)
- Breadboard and jumper wires
- USB cable
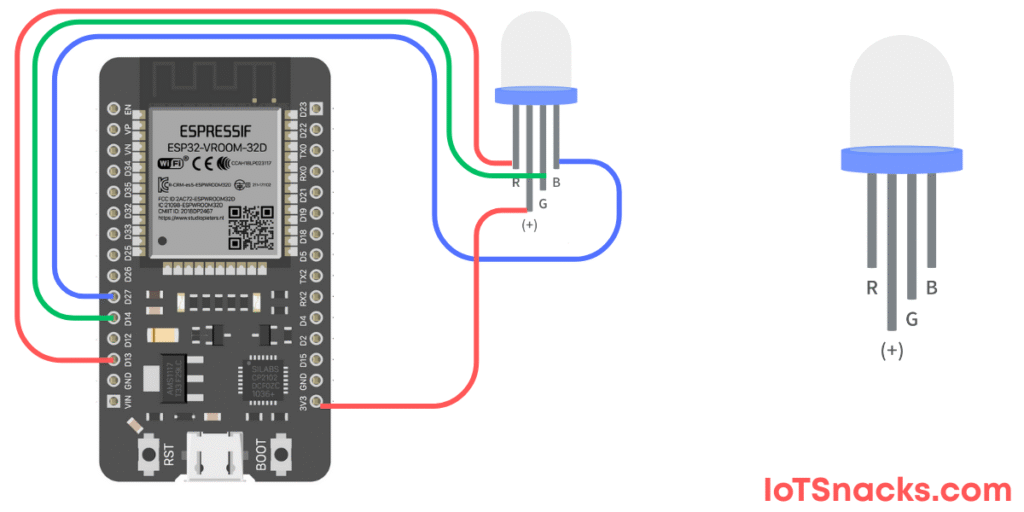
Circuit Diagram
- RGB LED Common Anode → 3.3V
- RGB LED Red pin → GPIO 13 (through resistor)
- RGB LED Green pin → GPIO 14 (through resistor)
- RGB LED Blue pin → GPIO 27 (through resistor)
- GND → ESP32 GND
⚠️ Important: Since this is a Common Anode RGB LED, writing a LOW signal turns the LED ON. Writing HIGH turns it OFF.
Arduino Code
// RGB LED with ESP32 DOIT DevKit v1 (Common Anode)

int redPin = 13;
int greenPin = 14;
int bluePin = 27;

void setup() {
  pinMode(redPin, OUTPUT);
  pinMode(greenPin, OUTPUT);
  pinMode(bluePin, OUTPUT);
}

void loop() {
  // Red
  digitalWrite(redPin, LOW);
  digitalWrite(greenPin, HIGH);
  digitalWrite(bluePin, HIGH);
  delay(1000);

  // Green
  digitalWrite(redPin, HIGH);
  digitalWrite(greenPin, LOW);
  digitalWrite(bluePin, HIGH);
  delay(1000);

  // Blue
  digitalWrite(redPin, HIGH);
  digitalWrite(greenPin, HIGH);
  digitalWrite(bluePin, LOW);
  delay(1000);

  // Yellow (Red + Green)
  digitalWrite(redPin, LOW);
  digitalWrite(greenPin, LOW);
  digitalWrite(bluePin, HIGH);
  delay(1000);

  // Cyan (Green + Blue)
  digitalWrite(redPin, HIGH);
  digitalWrite(greenPin, LOW);
  digitalWrite(bluePin, LOW);
  delay(1000);

  // Magenta (Red + Blue)
  digitalWrite(redPin, LOW);
  digitalWrite(greenPin, HIGH);
  digitalWrite(bluePin, LOW);
  delay(1000);

  // White (All ON)
  digitalWrite(redPin, LOW);
  digitalWrite(greenPin, LOW);
  digitalWrite(bluePin, LOW);
  delay(1000);
}
Step-by-Step Code Explanation
- Define RGB Pins
int redPin = 13, greenPin = 14, bluePin = 27;
Assign ESP32 GPIOs for R, G, and B.
Setup Function
pinMode(redPin, OUTPUT);
pinMode(greenPin, OUTPUT);
pinMode(bluePin, OUTPUT);
Configure all three pins as outputs.
Loop Function
- First turn on Red, then Green, then Blue.
- Mix two colors to form Yellow, Cyan, and Magenta.
- Turn on all three to get White.
- Each color stays ON for 1 second.
⚠️ Remember: LOW = ON, HIGH = OFF (because it’s a common anode LED).
Output
- The RGB LED will cycle through: Red → Green → Blue → Yellow → Cyan → Magenta → White.
- You can extend this by using PWM (analogWrite) for smooth color fading (covered in a future tutorial).
Real-Life Applications
- Smart Lighting – mood lighting with different colors.
- Status Indicators – Wi-Fi status (green for connected, red for error).
- IoT Devices – show system state (blue = active, yellow = warning).
- Decorative Projects – RGB effects in home automation.
Troubleshooting
| Problem | Cause | Solution |
|---|---|---|
| LED doesn’t light | Wrong pin connections | Check Red=13, Green=14, Blue=27 |
| Wrong colors | Common Anode/Cathode mismatch | Ensure you’re using Common Anode |
| Colors too dim | High resistor value | Use 220Ω – 330Ω resistors |
| ESP32 resets | Short circuit | Double-check wiring |
Can I use a Common Cathode RGB LED instead?
Yes, but the logic will be reversed (HIGH = ON, LOW = OFF).
Can I control brightness of RGB LED?
Yes, by using PWM (analogWrite) on each pin. We’ll cover this in the PWM tutorial.
Why do I need resistors for RGB LED?
Resistors limit current and prevent LED damage.
Can I make smooth color transitions?
Yes, by combining PWM signals, you can fade colors smoothly.
What is the operating voltage of RGB LED?
RGB LEDs typically work at 2V–3.3V per color, which is safe for ESP32.