
Now Reading: Getting Started with ESP8266: A Beginner’s Guide
-
01
Getting Started with ESP8266: A Beginner’s Guide

Introduction
The ESP8266 is one of the most popular Wi-Fi microcontrollers used in IoT (Internet of Things) and embedded systems. It’s low-cost, powerful, and easy to program, making it perfect for beginners who want to build smart devices such as Wi-Fi switches, temperature monitors, and home automation systems.
In this tutorial, you’ll learn what ESP8266 is, how to set it up, and how to run your first program. By the end, you’ll be ready to start creating your own IoT projects.
What is ESP8266?
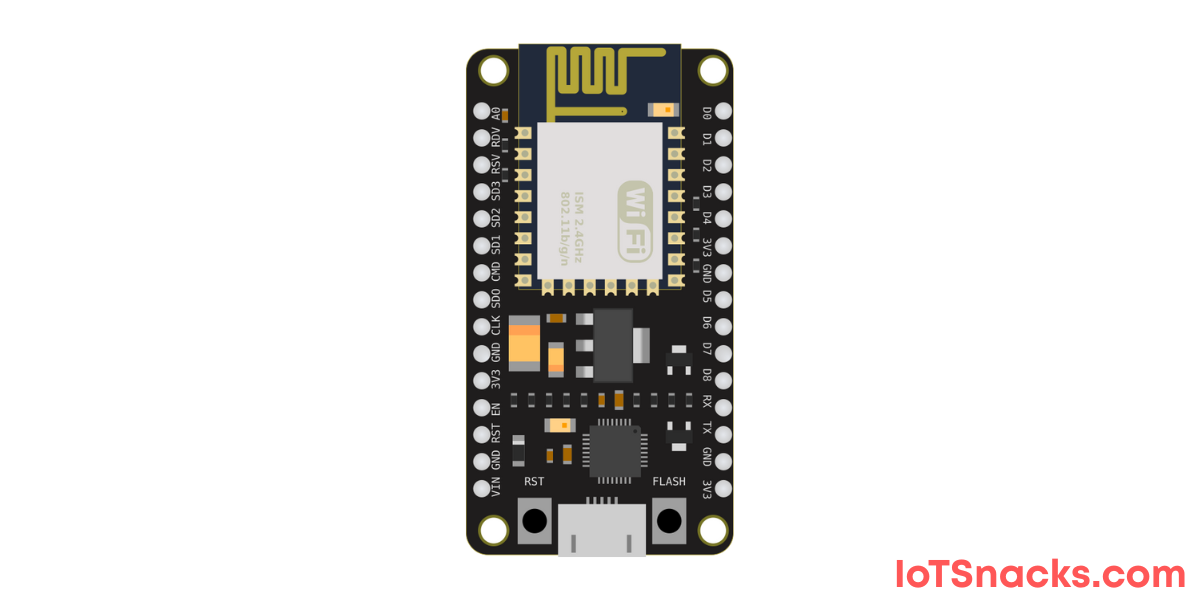
The ESP8266 is a Wi-Fi-enabled microchip developed by Espressif Systems. It can act as both a microcontroller (like Arduino) and a Wi-Fi module. Some of the most popular ESP8266 development boards include:
- NodeMCU ESP8266
- Wemos D1 Mini
- ESP-01 Module
These boards come with built-in USB support, making it easier to upload code directly from your computer.
Key Features of ESP8266:
- 32-bit microcontroller
- Built-in Wi-Fi (802.11 b/g/n)
- Clock speed up to 80 MHz (can be overclocked to 160 MHz)
- GPIO pins for sensors, relays, and other components
- Compatible with Arduino IDE
Components You Need
To get started with ESP8266, you’ll need:
- ESP8266 board (NodeMCU or Wemos D1 Mini recommended)
- Micro-USB cable
- Computer with internet connection
- Arduino IDE installed
- (Optional) Breadboard, LED, and resistor for testing
Setting Up Arduino IDE for ESP8266
Follow these steps to set up the Arduino IDE:
- Download Arduino IDE (if not already installed) from Arduino’s official website
- Open Arduino IDE → Go to File > Preferences.
- In the Additional Board Manager URLs field, paste this link:
http://arduino.esp8266.com/stable/package_esp8266com_index.json
- Go to Tools > Board > Board Manager, search for ESP8266, and click Install.
- Select your board under Tools > Board (e.g., NodeMCU 1.0 or Wemos D1 Mini).
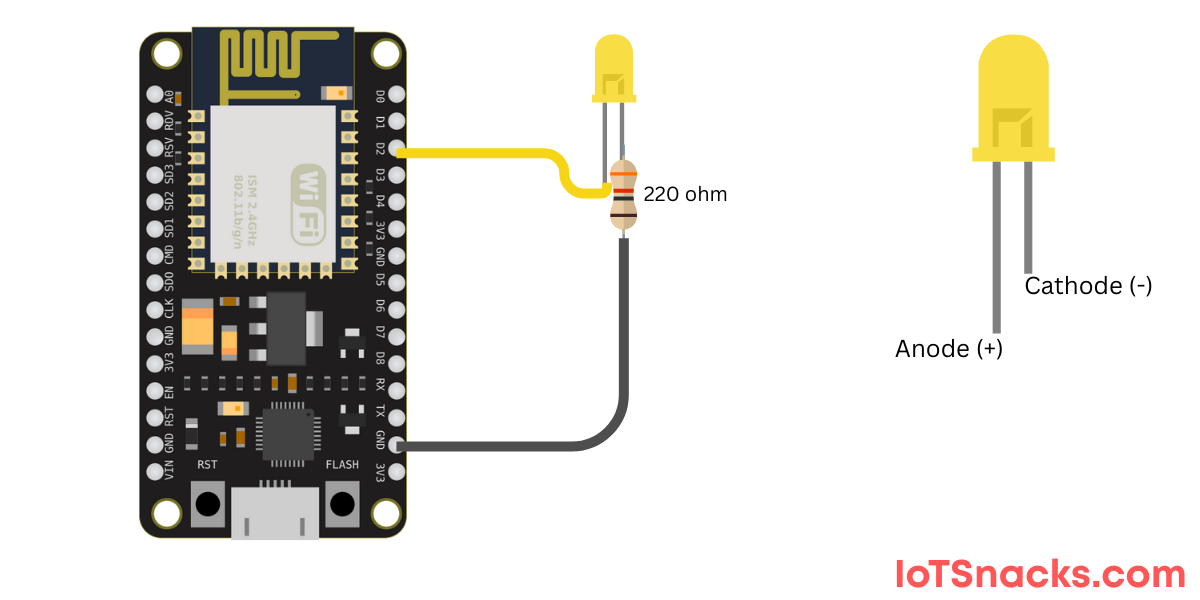
Your First ESP8266 Program (Blink Example)
Let’s upload a simple Blink LED program to test if everything is working.
// ESP8266 Blink LED Example
// Built-in LED is usually on GPIO2 (D4 on NodeMCU)

void setup() {
  pinMode(LED_BUILTIN, OUTPUT); // Set LED pin as output
}

void loop() {
  digitalWrite(LED_BUILTIN, LOW);  // Turn LED on
  delay(1000);                     // Wait for 1 second
  digitalWrite(LED_BUILTIN, HIGH); // Turn LED off
  delay(1000);                     // Wait for 1 second
}
Steps to Upload Code:
- Connect ESP8266 board to your computer using USB cable.
- Select the correct COM port under Tools > Port.
- Click the Upload button in Arduino IDE.
- The onboard LED should start blinking every second. 🎉
ESP8266 GPIO Pins Overview
The ESP8266 is a powerful Wi-Fi microcontroller used in countless IoT projects. One of its most important features is its GPIO pins (General Purpose Input/Output), which allow you to connect LEDs, sensors, relays, and more.But here’s the tricky part: Not all pins on ESP8266 are safe to use, and some are reserved for special functions like boot mode, flash, or serial communication.
Below you will learn detailed information about ESP8266 GPIO Pins which will help you to understand GPIO pins nature and help you to select those pins which will not effect on your future development as well as help you to avoid the complexities during project development.
- ESP8266 pinout diagram and pin mapping
- Safe GPIOs for input/output
- Pins to avoid
- Example code with step-by-step explanation
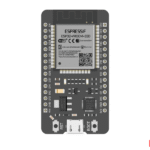
ESP8266 Development board types
For beginners, the most common boards are:
- NodeMCU ESP8266
- Wemos D1 Mini
Both have 16 GPIO pins, but not all are available for use.
NodeMCU ESP8266 Pin Mapping (important)

| NodeMCU Pin | ESP8266 GPIO | Function / Notes |
|---|---|---|
| D0 | GPIO16 | No PWM, no I2C, used for wake-up |
| D1 | GPIO5 | Safe to use |
| D2 | GPIO4 | Safe to use |
| D3 | GPIO0 | Boot mode pin → Use with caution |
| D4 | GPIO2 | Onboard LED (inverted logic) |
| D5 | GPIO14 | Safe to use |
| D6 | GPIO12 | Safe to use |
| D7 | GPIO13 | Safe to use |
| D8 | GPIO15 | Boot mode pin → Use with caution |
| RX | GPIO3 | UART RX (can be used if not needed for serial) |
| TX | GPIO1 | UART TX (can be used if not needed for serial) |
| A0 | ADC0 | Analog input (0–1V max) |
ESP8266 Pins to Avoid
- D0 (GPIO16): No PWM, I2C. Only for deep-sleep wake.
- D3 (GPIO0), D4 (GPIO2), D8 (GPIO15): Used for boot mode → avoid unless necessary.
- RX (GPIO3) & TX (GPIO1): Used for serial communication → avoid unless you don’t need Serial Monitor.
⚠️ Warning: GPIO0, GPIO2, and GPIO15 affect boot mode. If used incorrectly, your ESP8266 may fail to start.
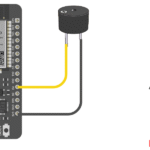
ESP8266 Safe GPIO Pins to Use
For general input/output with sensors, LEDs, or relays, use these pins:
✅ Recommended GPIOs: D1 (GPIO5), D2 (GPIO4), D5 (GPIO14), D6 (GPIO12), D7 (GPIO13).
Common Errors & Troubleshooting
- ESP8266 not detected? → Install correct USB driver (CH340/CP2102).
- Upload failed? → Select the right board and COM port.
- Wi-Fi not connecting? → Double-check SSID and password.
Real-World Applications of ESP8266
- Home automation (smart lights, switches)
- IoT weather stations
- Smart agriculture sensors
- Security systems (motion, door sensors)
- Remote monitoring
Conclusion
The ESP8266 is a powerful yet budget-friendly microcontroller for IoT beginners. With built-in Wi-Fi and easy Arduino IDE support, it allows you to quickly move from idea to prototype. In this tutorial, you learned how to set up the ESP8266, upload your first Blink program, and connect it to Wi-Fi.
Now you’re ready to build exciting IoT projects like smart homes, environmental monitoring, and automation systems. 🚀
Is ESP8266 better than Arduino Uno?
For IoT, yes. ESP8266 has built-in Wi-Fi and more processing power compared to Arduino Uno.
Can I use ESP8266 without Wi-Fi?
Yes, ESP8266 can run offline as a microcontroller, but its main advantage is Wi-Fi.
What is the difference between ESP8266 and ESP32?
ESP32 is more powerful with dual-core CPU, Bluetooth, and more GPIOs, while ESP8266 is cheaper and simpler.
How much current can GPIO pins supply?
About 12 mA safely per pin. Use transistors or relays for high-current devices.
Does ESP8266 have PWM pins?
Yes, all digital pins can generate PWM signals (0–1023 duty cycle).